How to Make an Anchor Chart
What is an anchor chart?
An anchor chart is more than just a poster. It is a teaching tool that “anchors” the key learning points for students.
Simply put, anchor charts are like the road map of what needs to be learned in a given topic or unit.
Typically, an anchor chart provides a visual summary of the main ideas, strategies, and skills being discussed, so it can be used as a powerful teaching tool especially for younger or less familiar learners. Teachers can create their own anchor charts or they can use one that has been created for them by another teacher.
How do you plan an anchor chart?
1. Determine Your Goal or Purpose
Begin with the end in mind and consider your ultimate goal or purpose for the anchor chart. Ideally, you want the anchor chart to be something you reveal during your instruction that students will be able to reference on their own as a study tool as well. Three popular purposes for anchor charts include:
Vocabulary Reference
Conceptual Understanding
How-To Steps / Procedures
2. Determine the Content for the Anchor Chart
The content component is the most important part of an anchor chart. It provides the students with information on what they are expected to know, understand, and do. Here are some good questions to ask yourself about the content to include:
What are the BIG ideas for the topic/lesson/unit?
What skills or ideas are so important that they will be used throughout the school year?
What do you know or expect students will struggle with?
How can content be broken down visually or into steps?
How might the content be grouped or organized?
The next step is considering what format would best display this information visually - words only, pictures only, words and pictures? If using both words and pictures, which one will be dominant? For more thoughts, check out my post: The 6 Mistakes Teachers Make with Anchor Charts.
3. Consider the Delivery of Content
It’s also good to think about how the content will be delivered - through lecture, guided notes, etc.
Is the anchor chart something you want to draw on paper in front of the class in real-time? Or will you include a digital version in your lesson slides? The big idea here is to have a plan for HOW you are going to introduce the anchor chart and reference it during your lesson.
With that said, keep in mind that the anchor chart itself is not the instruction … It’s a capturing tool during the instruction.
Lastly, consider what you will do with the anchor chart AFTER the instruction. I recommend posting it only after you’ve introduced it to students during a lesson. In other words, do not have all your beautiful anchor charts posted on the first day of school. I also feel it is a best practice to keep the anchor chart posted and visible until the majority of students are meeting that standard.
What is on an anchor chart?
When I make an anchor chart, I like to include the following components:
The title of the topic;
Bulleted definitions, if needed;
Essential images, illustrations, or diagrams;
Labeled examples;
CONCISE text that summarizes the content
(emphasis on CONCISE because too much content is one of The 6 Mistakes Teachers Make with Anchor Charts)
Color coding can be helpful to consider when creating an anchor chart in order to indicate important information or related ideas; however, make sure you are intentional and show some restraint so the colors do not distract from the content.
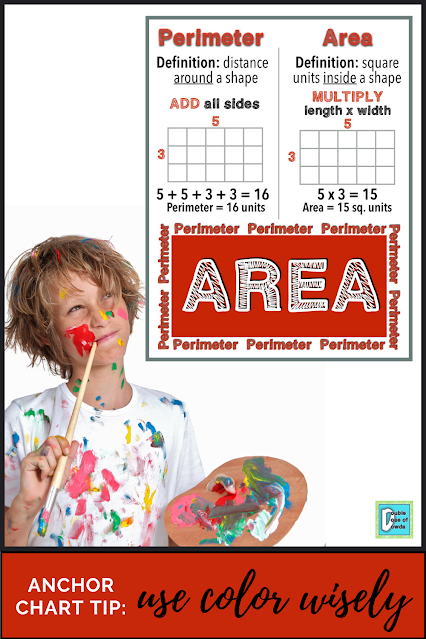
Here are some examples of anchor charts I’ve created with these components.


No comments
Post a Comment